C5FG1XK1 - 607
REMOVAL-REFITTING OF THE FLOOR CONSOLE
1 - SPECIAL TOOLS

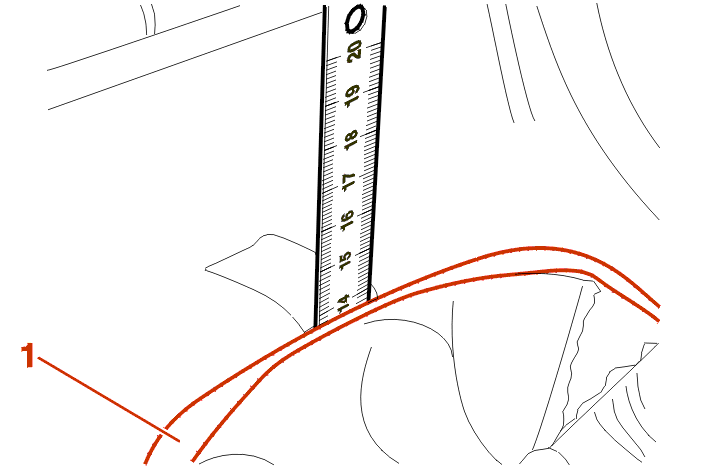
{{N2949}} prendre un réglet de 300 mm et le couper en 4 morceaux .
2 - REMOVAL
Disconnect the battery .

Move the front seats as far back as possible .
Press the lever (A) to open the storage compartment .

{{N2951}} mettre des rubans adhésifs, comme indiqué .
Pull the gear lever knob to remove it .
4 AUTOMATIC GEARBOX
Place the gear selection lever in position N .
ALL MODELS
{{N2952}} enfoncer au maximum un morceau de réglet, comme indiqué ci-dessus, aux points (B), (C), (D), (E) .
4 AUTOMATIC GEARBOX
{{N2953}} déclipper le côté gauche de l'enjoliveur (1), à l'aide d'une spatule en plastique .
5 GEARBOX
{{N2954}} déclipper le côté gauche de l'enjoliveur (1), en tirant sur le soufflet .
ALL MODELS
{{N2955}} prendre les morceaux de réglet en (C), (D) et les positionner en (F), (G), pour déclipper le côté droit de l'enjoliveur .
4 AUTOMATIC GEARBOX
{{N2956}} déposer l'enjoliveur (1) vers le haut .
5 GEARBOX
{{N2957}} déposer l'ensemble enjoliveur-soufflet vers le haut .
ALL MODELS
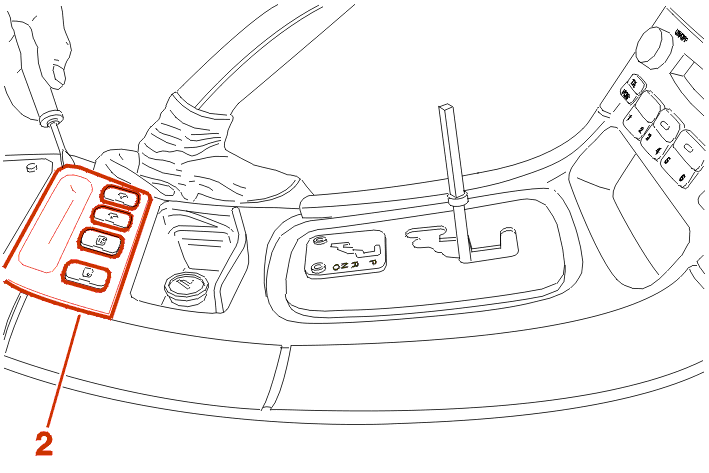
Using a spatula, unclip the trim (2) .
Pull the handbrake handle to remove it .
4 AUTOMATIC GEARBOX

Pull the gear lever panel assembly (3), upwards, to detach it from the console .

Disconnect the connector (4) .
Remove the board (3) .
ALL MODELS
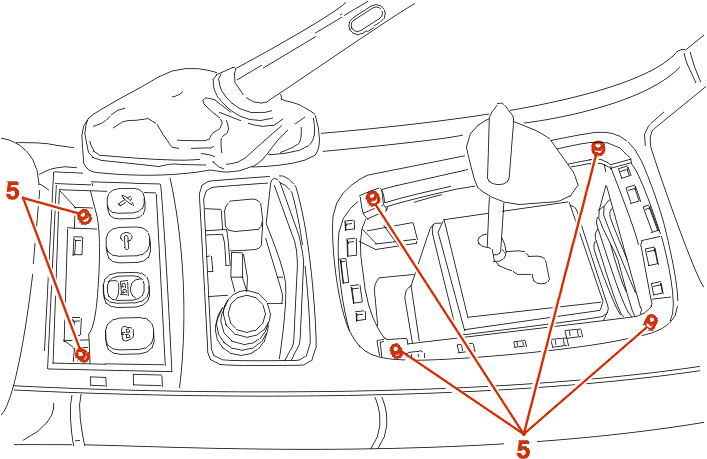
Remove the fastenings (5) .
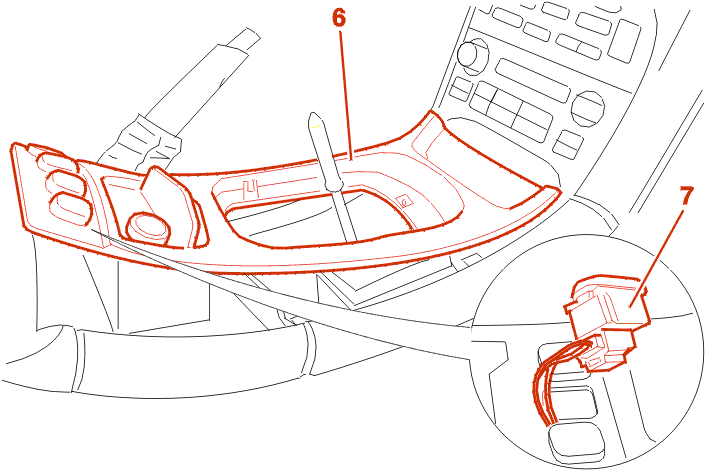
Raise the plate (6) at the rear .
Detach the switches (7) .
Disconnect the switches (7) (According to specification) .
Remove the board (6) .
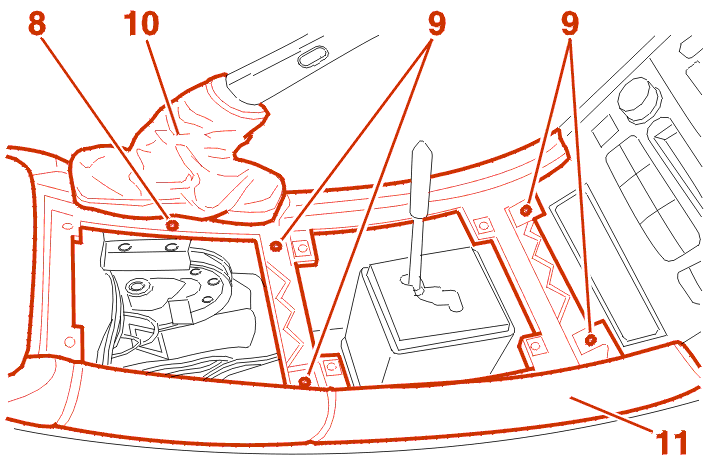
Remove :
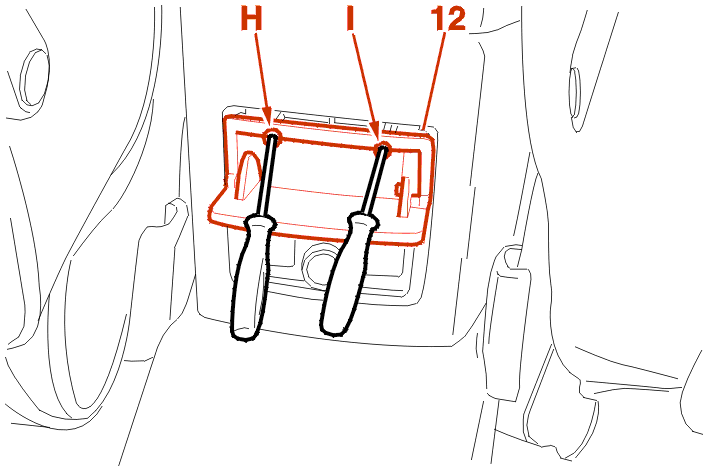
Using 2 flat screwdrivers, unclip the ashtray support (12) at points (H) and (I) .
Disconnect the connectors (According to specification) .
Remove : The ashtray bracket (12) .
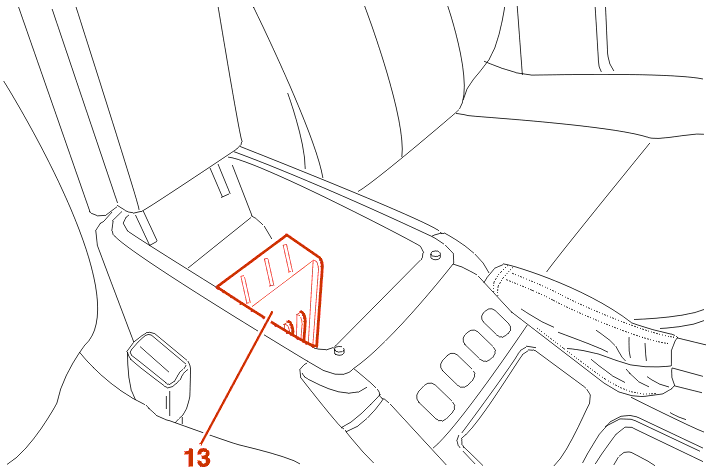
Remove the cd storage compartment (13) .

Remove the fasteners (14) .
Unclip : The diagnostic socket (15) .

On each side : Remove :
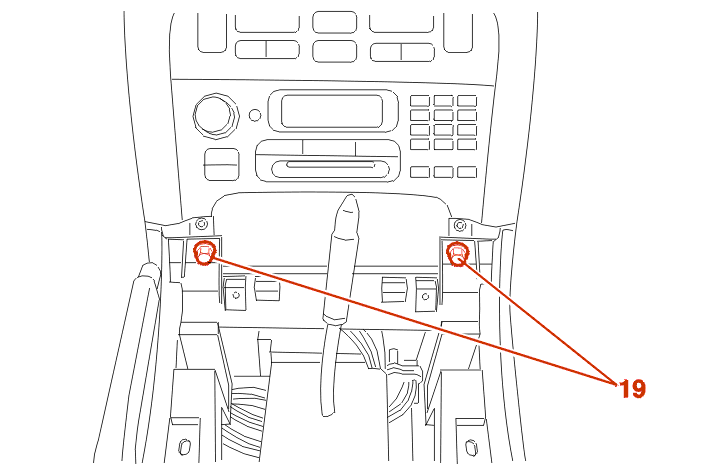
Remove the fasteners (19) .
Remove the floor console .
3 - REFITTING
Proceed in the reverse order to removal .
4HP20 AUTOMATIC GEARBOX

WARNING : check the position of the selection grid (20) on the panel (3) (see figure above) before refitting the assembly on the console .
ALL MODELS
Connect the battery .
Check the operation of the equipment .