C4BG1DF1 - 307
REMOVAL - REFITTING REAR SCREEN
1 - PARTS REQUIRED
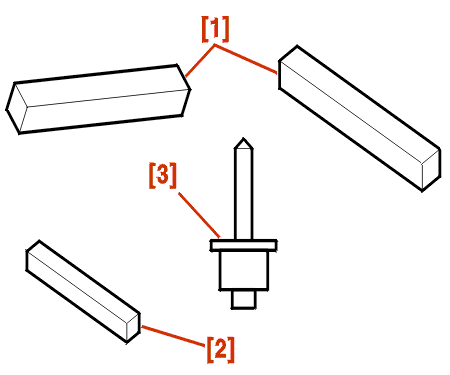
[1] Upper and lower shims (X4) .
[2] Upper centre shim (X1) .
[3] Flared rivets (X3) .
NOTE : supplied with the windscreen .
2 - REMOVAL
NOTE : tailgate open position .
Protect :
Remove :
Disconnect the demisting connections : Seat the tabs against the screen .
2 - 1 - CUTTING OF THE FIRST AREA
WARNING : when cutting out, avoid rubbing the wire on the dropped flange .
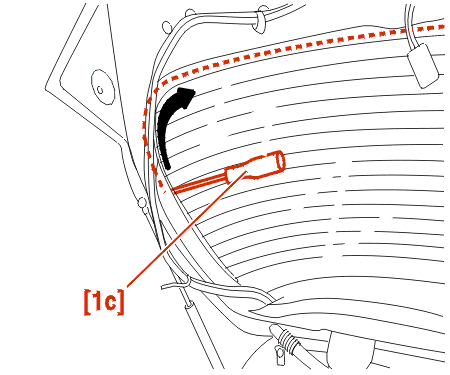
Thread the cutting wire into the awl and pass it towards the interior (approximately 50 cm) .
THREAD THE CUTTING OUT WIRE INTO THE COILING DEVICE [1A] AND TIGHTEN IT .
Pass the cutting wire under the rear screen from left to right .
Pass the awl through the bead of adhesive, from the interior to the exterior at the right strut ball joint .
Thread the cutting out wire into the awl and route it towards the inside .
Secure the end of the wire onto the right strut ball joint .
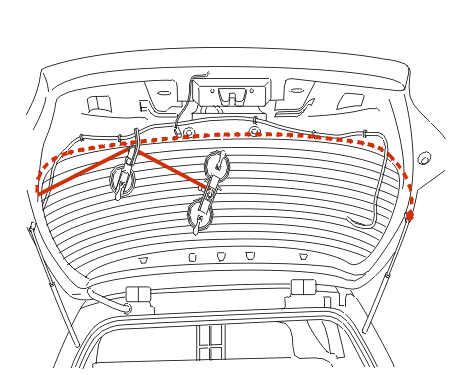
MOVE THE WINDING DEVICE [1A] AND INSTALL THE RETURN ROLLER [1B] .
Route the wire as indicated on the diagram .
Cut out the glass until the cutting wire is no longer guided by the guide pulley .
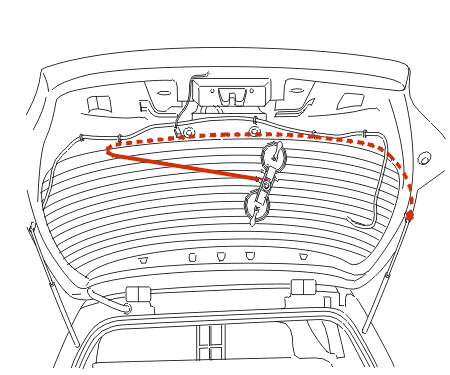
Cut out in accordance with the above view, in the same conditions as previously .
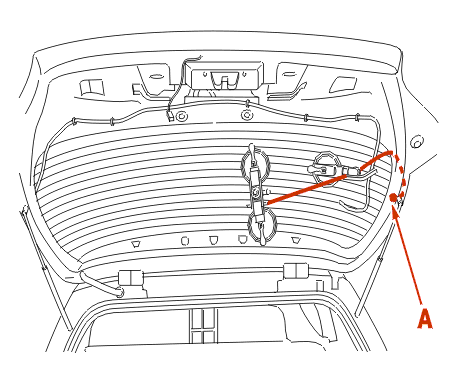
Cut out in accordance with the above view, in the same conditions as previously (Up to point A) .
2 - 2 - CUTTING OF THE SECOND AREA
Pass the awl [1c] through the bead of adhesive, from the interior to the exterior, at the right strut ball joint .
Thread the cutting wire into the awl and pass it towards the interior (approximately 50 cm) .
Thread the cutting out wire into the coiling device [1a] and tighten it .
Pass the cutting wire under the rear screen from right to left .
Pass the awl through the bead of adhesive, from the interior to the exterior, at the left strut ball joint .
Thread the cutting out wire into the awl and route it towards the inside .
Secure the end of the wire onto the left strut ball joint .
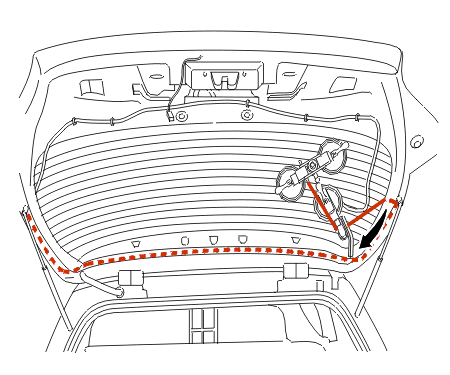
Move the winding device [1a] and install the return roller [1b] .
Route the wire as indicated on the diagram .
Cut out the glass until the cutting wire is no longer guided by the guide pulley .
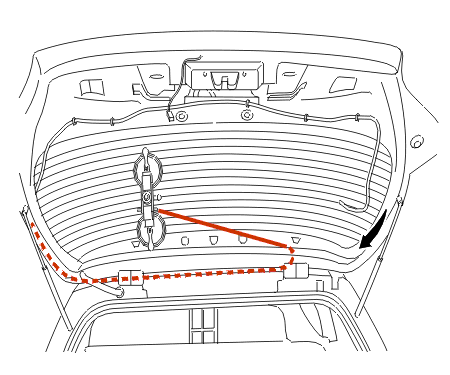
Move the coiling device as shown on the figure and continue cutting out .
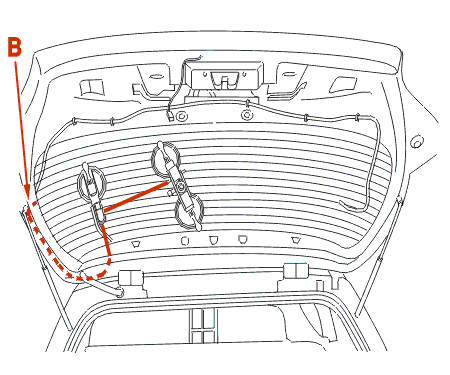
Cut out in accordance with the above view, in the same conditions as previously (Up to point B) .
NOTE : for the following operation 2 people are necessary (to retrieve the rear screen) .
REMOVE THE SCREEN USING THE SUCTION CUPS [4] .
3 - PREPARATION FOR REMOVAL
3 - 1 - PREPARATIONS FOR REFITTING THE GLASS
Re-used rear screen :
Do not remove the residue completely; the residue is used as a base layer and improves adhesion of the adhesive and sealing products .
WARNING : do not apply primer to the surface to be bonded and do not treat it with the cleaning solvent .
New rear screen :
Windscreen aperture flange reworked :
3 - 2 - TAILGATE PREPARATION
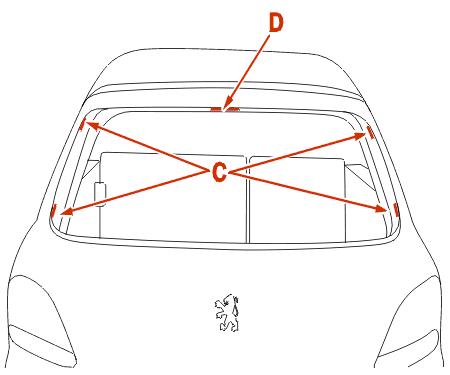
Fit the 4 shims [1] at C on the tailgate .
Fit the shim [2] at D on the tailgate .
3 - 3 - LAYOUT OF THE REAR SCREEN ON THE TAILGATE
Two people are required to offer up and fit the glass on the tailgate .
First align the glass at the top of the tailgate + (angles) .
Place adhesive strips at the top and the side, which will serve as reference points for the final positioning of the rear screen .
Cut out the markers .
Remove the rear screen .
4 - REFITTING
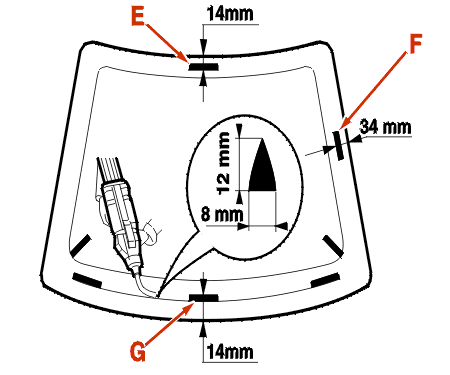
Fit the mastic mixer assembly to the extruder gun .
Take the nozzle supplied in the bonding kit .
CUT THE NOZZLE TO 8 MM DIA. AT 12 MM FROM THE TIP .
Apply the bead of adhesive :
IMPERATIVE : no more than 8 minutes must elapse between applying the mastic and positioning the glass (for the quick bonding adhesive mastics) .
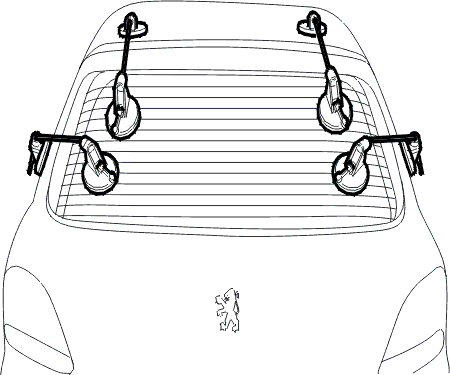
For the fitting operation, two people are required .
Offer up the glass to the aperture opposite the markers USING THE SUCTION CUPS [4] .
APPLY CONSTANT PRESSURE USING THE SUCTION CUPS [5] .
Leave a clearance between the rear screen and the flange to permit passage of the cutting wire if the rear screen is removed again .
leave to dry depending on the bonding kit .
Proceed in the reverse order to removal .
Check the operation of the electrical equipment .
Clean the glass .