C5CG28F1 - 307
REMOVAL - REFITTING WINDSCREEN
1 - SPECIAL TOOLS

[1] Stripping tool (-).1349-H .
2 - PARTS REQUIRED
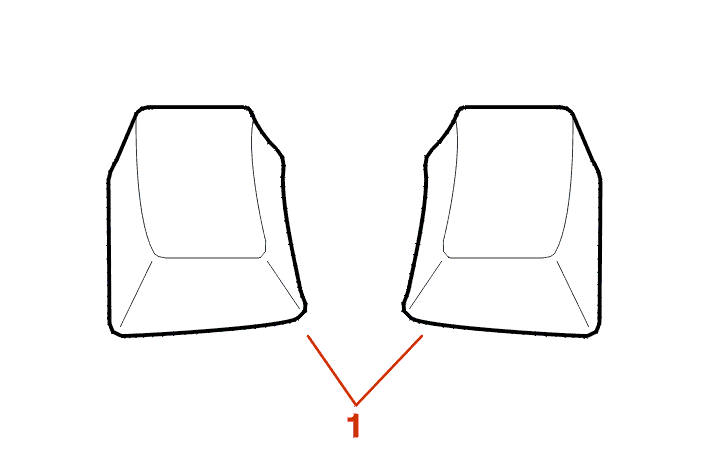
(1) Lower shims (X 2) .
NOTE : supplied with the windscreen .
3 - REMOVAL
Remove :
NOTE : on a sun visor with illuminated mirror, add a grommet for use on refitting .
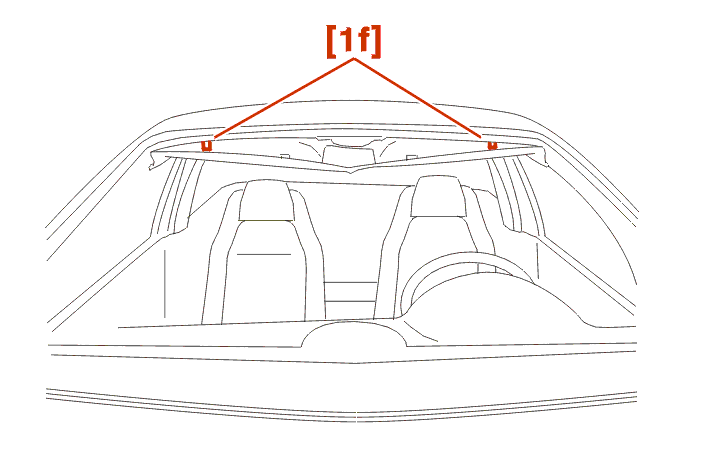
POSITION THE 2 SHIMS (1F) TO MOVE ASIDE THE HEADLINING .
REMOVE THE WINDSCREEN WIPER ARMS .
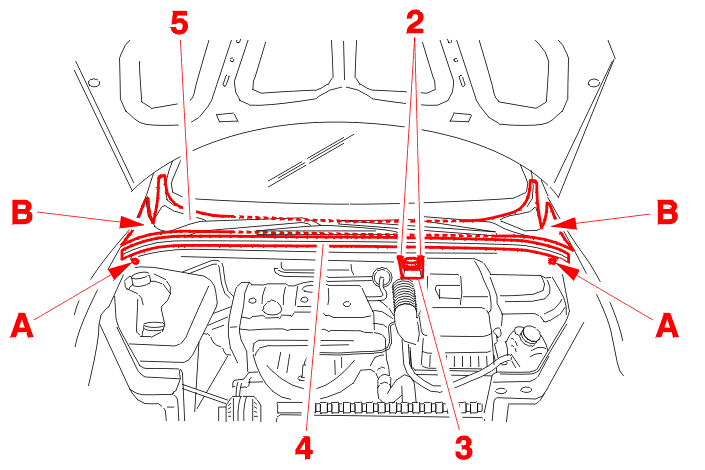
Remove :
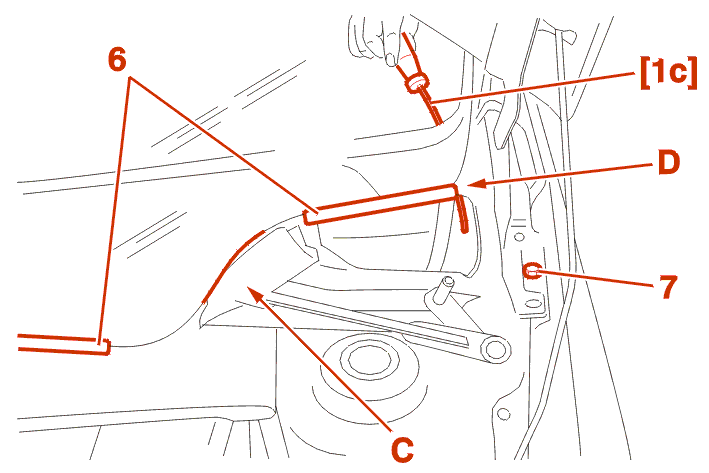
Remove the windscreen base formed sections (6) .
SECURE THE CUTTING WIRE [1E] ON THE MOUNTING (7) .
On each side : Apply adhesive tape at (C) to protect the flange .
PASS THE AWL [1C] THROUGH THE BEAD OF ADHESIVE FROM THE INTERIOR TOWARDS THE EXTERIOR, AT (D) .
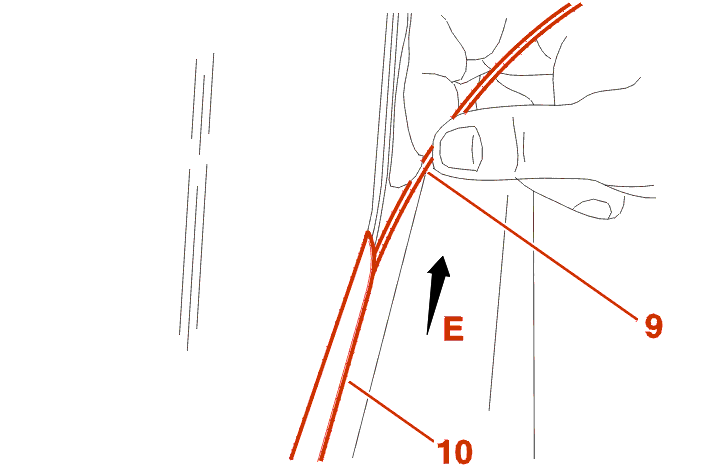
IMPERATIVE : pass the cutting wire (9) under the windscreen seal (10) following (E) all around the edge .
THREAD THE CUTTING WIRE IN THE AWL [1C] AND PASS IT TOWARDS THE INTERIOR (50 CM APPROXIMATELY) .

WARNING : when tensioning the cutting wire, ensure that the wire is positioned correctly under the windscreen seal and under the windscreen .
NOTE : if the windscreen is to be reused, apply pieces of adhesive tape (11) which will serve as indicators for refitting, cut at (F) .
SECURE THE OTHER END OF THE CUTTING WIRE IN THE WINDING DEVICE [1A] .

IMPERATIVE : place the tool [1] between the cutting wire and the instrument panel to protect the latter, for cutting of the lower section of the windscreen .
Begin cutting the lower section of the windscreen .
WARNING : cutting this section requires special attention: the lower section of the windscreen is retained by 2 beads of adhesive, therefore care must be taken not to break the cutting wire .

As soon as the wire is no longer being guided, move the tools .
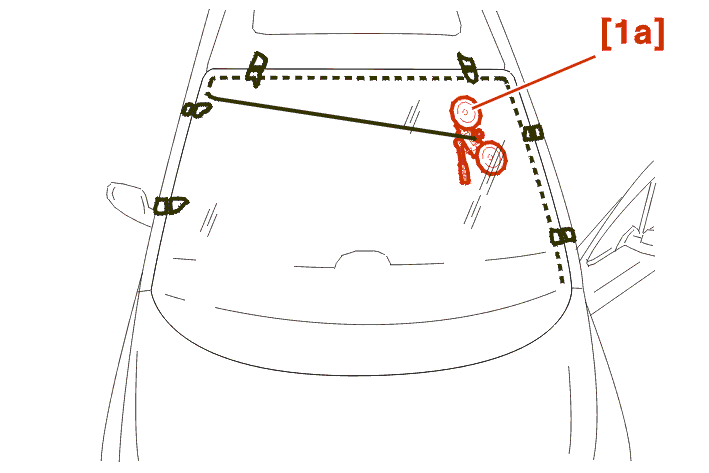
Continue to cut-out .
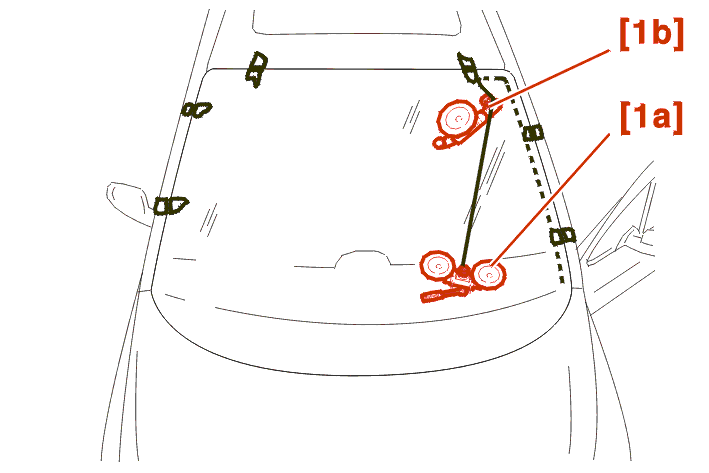
Observe the correct routing of the wire .
Continue to cut-out .
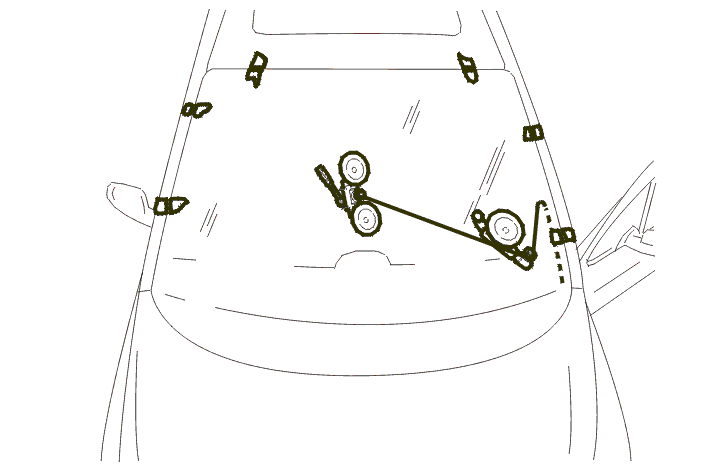
Continue to cut-out .
REMOVE THE WINDSCREEN USING THE SUCTION CUPS [4] .
4 - REFITTING
IMPERATIVE : if the windscreen is to be replaced, fit a new rain sensor .
4 - 1 - PREPARATION OF FLANGE AND SCREEN
Protect the instrument panel and the interior of the vehicle .
FIT BLADE [15] NO.146 TO THE ELECTRIC KNIFE .

IMPERATIVE : trim the bead of adhesive (12) on the windscreen taking care not to damage the windscreen seal (13) .
Trim the bead of adhesive on the flange .
Offer up the glass to the aperture .
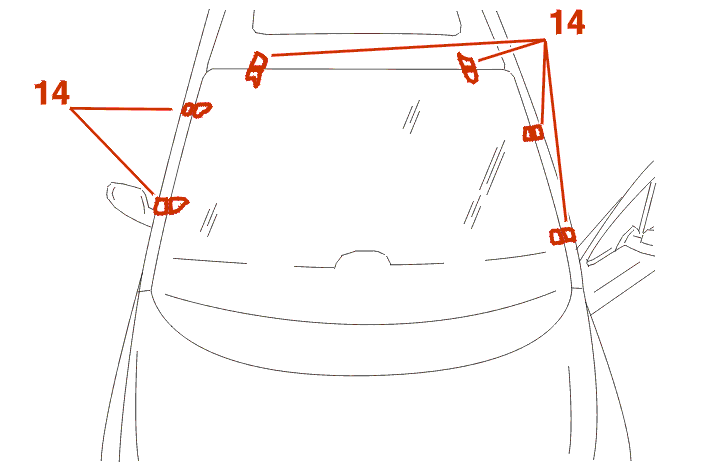
NOTE : if the windscreen is to be replaced, centre it and position adhesive tape (14), as shown above .
Cut the tapes and remove the glass .
Touch up with anti-corrosion product .
degrease the flange and the windscreen with the product selected from the adhesive kit .
Allow to dry for 10 mn .
apply the metal and glass primers selected from the adhesive kit .
4 - 2 - BONDING
If the windscreen is to be refitted : Refit the windscreen base formed sections taking care to observe the marks in the windscreen .
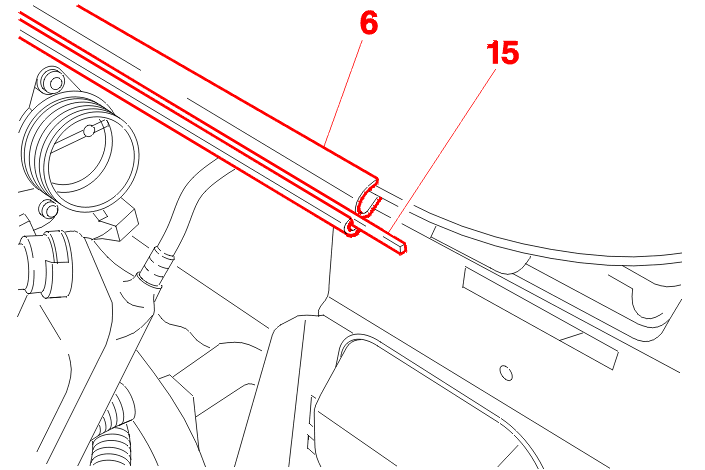
NOTE : if the windscreen is to be replaced : the formed sections are supplied with the windscreen ; remove the formed sections (15) plastic strips (6) .
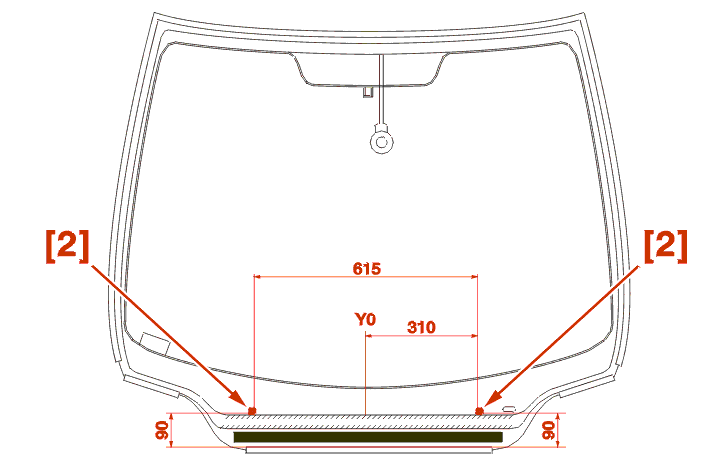
Position the 2 shims (1) 90 mm from the lower central formed section and 310 mm from the windscreen centreline of symmetry (Y0) .
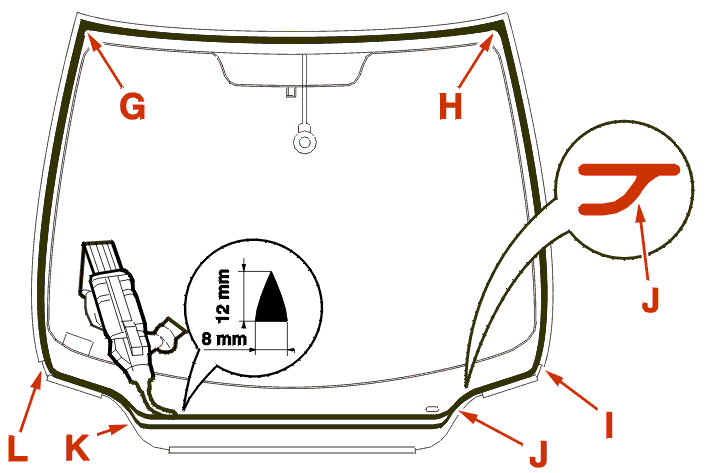
Fit the mastic mixer assembly to the extruder gun .
take the nozzle supplied in the bonding kit [1] .
Cut the nozzle to 8 mm dia. at 12 mm from the tip ; USING A SPECIAL CLAMP FOR CUTTING VENTURIS [7] .
IMPERATIVE : the bead of adhesive must never in any circumstances touch the windscreen seal .
Apply the bead of adhesive :
Apply a second bead of adhesive from point (J) to point (K) 56 mm from the windscreen base formed section .
IMPERATIVE : to guarantee soundproofing of the passenger compartment, the sealing of the 2 beads must be ensured when they are applied; do not apply any surplus product at points (J - K) and ensure that the beads are parallel .
IMPERATIVE : no more than 8 minutes must elapse between applying the mastic and positioning the glass (for the quick bonding adhesive mastics) .
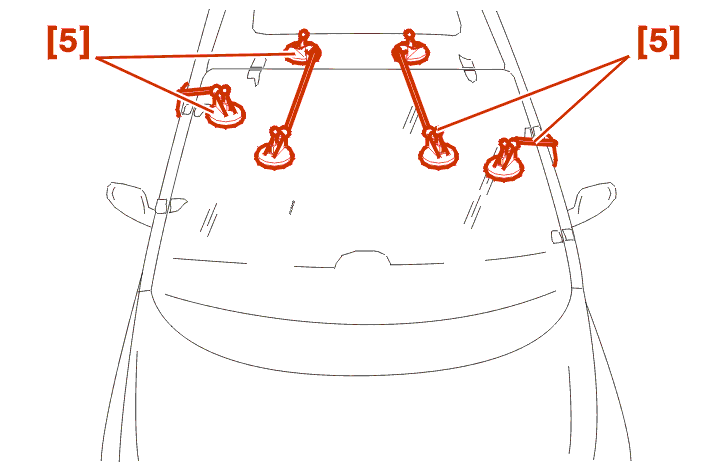
Position the windscreen in relation to the pieces of adhesive tape, lifting the lower section near the bonnet in order not to deposit adhesive on the fascia .
APPLY CONSTANT PRESSURE USING THE SUCTION CUPS [5] .
Allow to cure for 30 minutes before handling .
Fit the arm/blade assemblies at the marks on the windscreen (dotted in graphics) .
Continue the fitting operations in the reverse order to removal .
Check :
Clean the glass .