B1BG15K1 - 607 ES9J4S ENGINE EMISSION CONTROL CEE 2000
REMOVAL - REFITTING POWER UNIT
1 - SPECIAL TOOLS

[1] cross beam (-).0135-A .
[2] Lifting chain (-).0102-M .
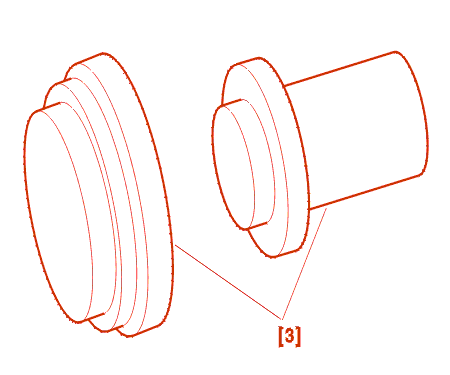
[3] final drive output oil seal fitting drifts (-).0332-A - (-).0332-B .

[4] Tool for unclipping the ball joints (Diameter 10) (-).0216-G1 .

[5] Pipe with adapter for valve SCHRADER (-).0141-T1 .

[6] Set of plugs (-).0188-T .
2 - REMOVAL
The power unit is removed from above .
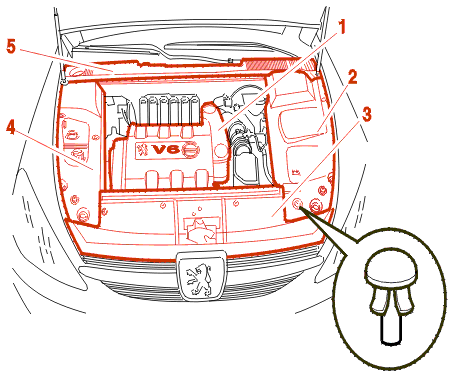
Remove :
NOTE : slightly push in the central pin of the bracket so that this is still retained by the claws of the bracket .
Drain :
ML5T GEARBOX
Drain the gearbox .
4HP20 AUTOMATIC GEARBOX
Do not drain the gearbox .
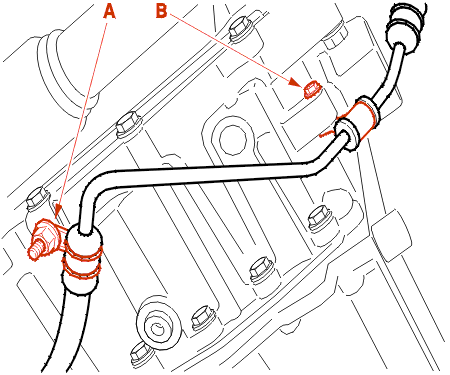
ALL MODELS
Unclamp :
Disconnect the battery .
Remove :
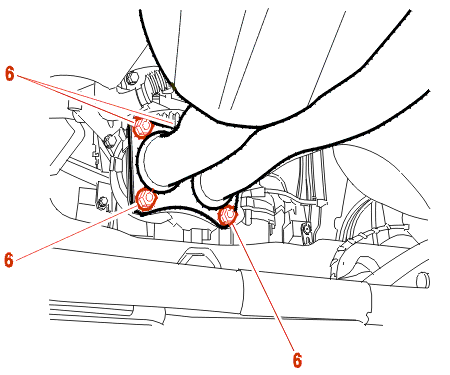
Remove :
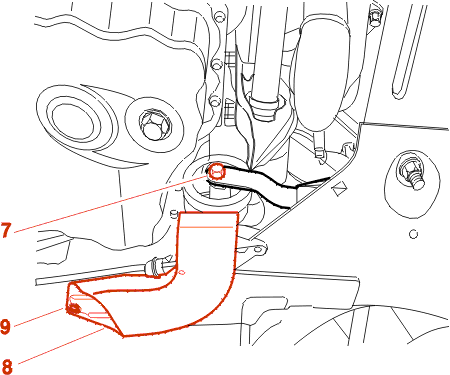
Remove the ventilation cover (8) from the lower mounting after removing the plastic rivet (9) .
Remove the lower reaction link rod (7) .
REMOVE FRONT AND REAR PRECATALYTIC CONVERTERS .
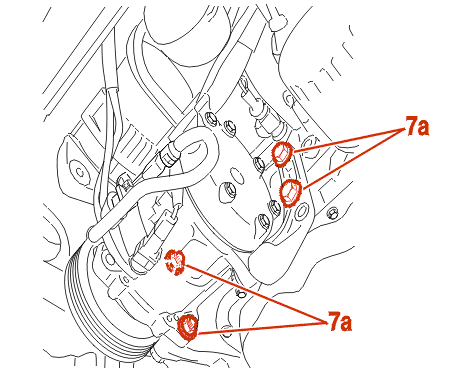
Disconnect the compressor electrical supply .
Unclamp the air conditioning pipe .
Remove the bolts (7a) .
Move aside the air conditioning compressor with its securing bracket without opening the fluid circuit .
Remove :
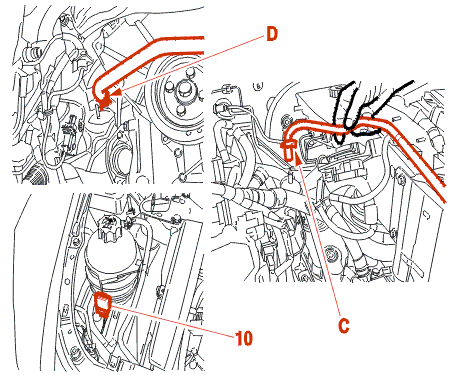
Unclamp :
Remove from their retaining clips :
Remove :
Lower the fuel pressure by connecting the end of the tool [5] to the valve SCHRADER; catch the fuel in a receptacle .
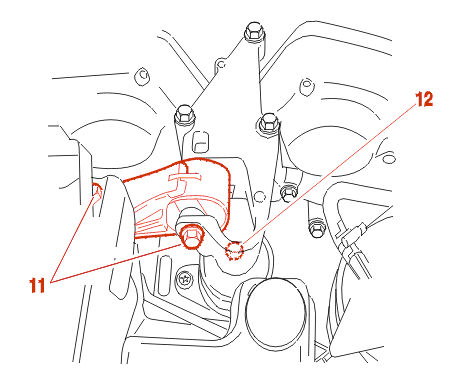
Remove :
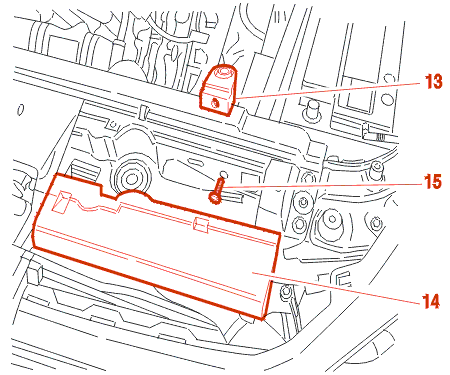
Remove :

Move aside :
4HP20 AUTOMATIC GEARBOX
The hose (19), heat exchanger side on the gearbox .
NOTE : the cooling pipe (19) on the heat exchanger for the gearbox .
ALL MODELS
Remove :
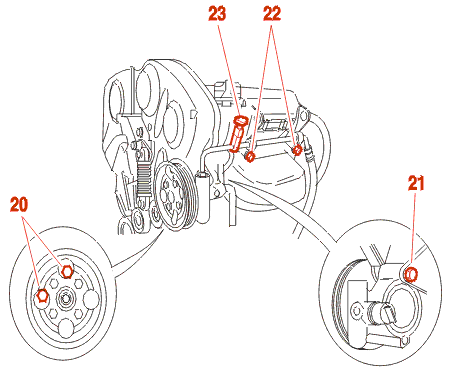
Remove :
Disconnect the connector (23) from the power steering circuit pressure sensor .
Do not dislodge the power steering pump from its bracket .
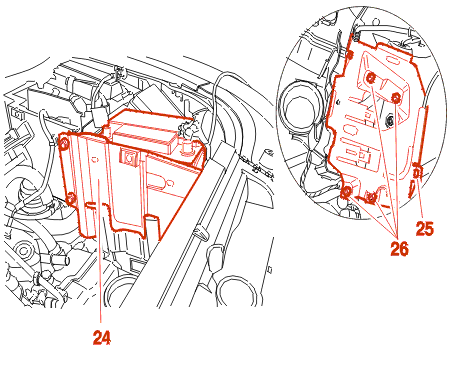
Remove :
Unclip the clip (25) .
Remove :
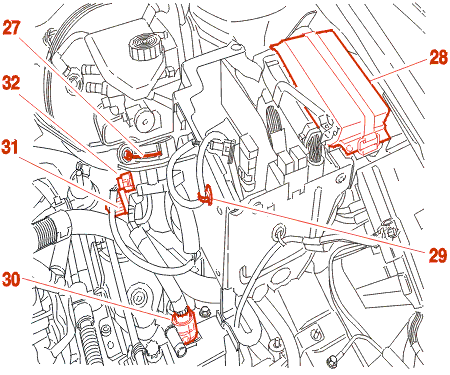
Unclip the accelerator cable (27) from the drum .
Disconnect :
4HP20 AUTOMATIC GEARBOX
Disconnect :
ALL MODELS
Unclip the clip (29) .
Remove :

Disconnect in the correct order the three conectors (34) - (35) - (36) by pushing on the tab at (E) and turning the lock (33) .
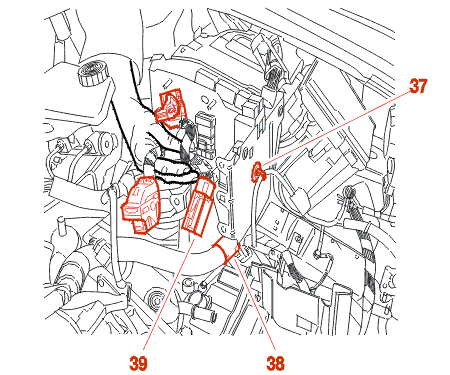
Pass the connectors under the ecu bracket .
Disconnect the double relay (39) .
Unclip the clip (37) .
Expand the ecu bracket .
Open the clip (38) on the engine harness .

Disconnect the harness (41) .
Remove :
Unclip the ventilation socket adaptor (42) from the air filter .
Remove :
Clamp the air filter bracket in the wing inner panel .
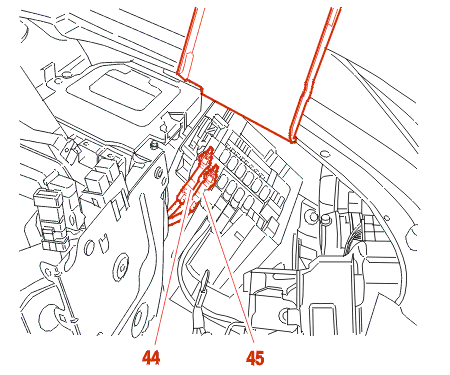
Remove :
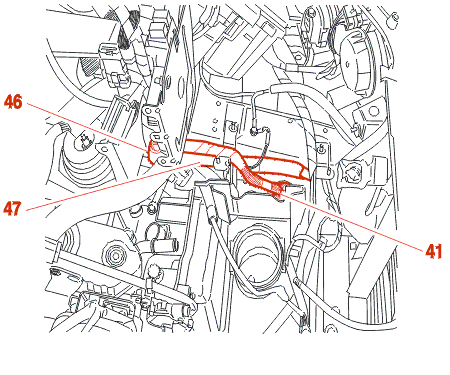
Expand the engine harness (41) on the engine .
Unhook the elbow (46) from the starter harness (47) .
Disconnect the starter harness from the main harness .
Vehicle with service battery :
Pass the starter harness under the air conditioning pipe and fold it down on the engine .
Move aside the bubble breaker with its unions .
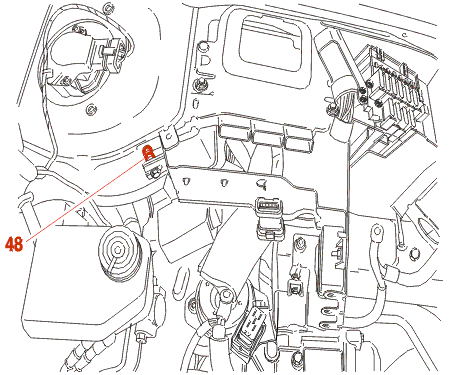
Slacken the nut (48) .
Remove the 2 bolts .
Move aside :
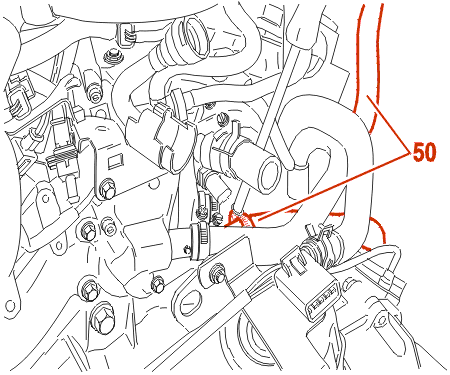
Separate hoses from heat exchanger (50) .
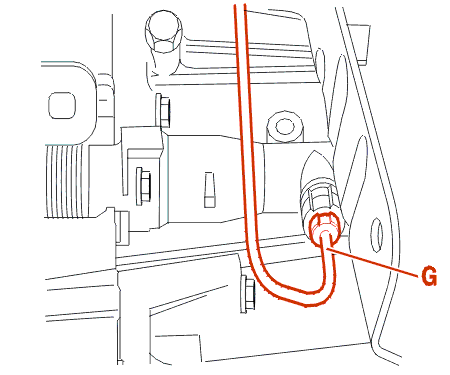
Disconnect the clutch control pipe At G .
IMPERATIVE : protect the ends of the pipe and the clutch slave cylinder using the tools [6] .
4HP20 AUTOMATIC GEARBOX
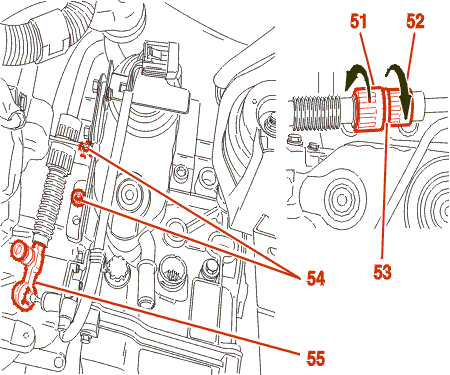
Remove the 2 mounting bolts (54) on the gearbox control cable adjustment bracket .
Unclip the link (55) .
Separate control cable take-up support by turning rings (51) and (52) in direction indicated, push ring (53) back into place .
Move aside :
ML5T GEARBOX

By means of tool [4], unclip ball joints (57) (change) and (56) (selection) .
Remove the clips .
ALL MODELS
Attach engine to hoist [1] by means of lifting chains [2] .

Remove :
Retrieve :
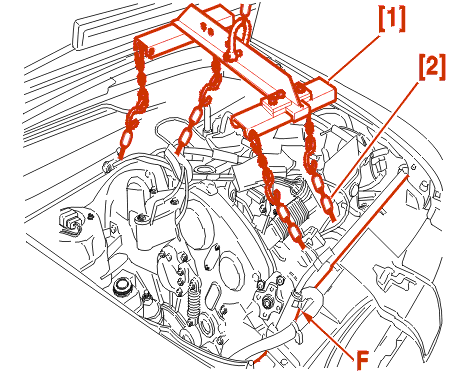
Lift power train until power steering pump is level with front crossmember .
Release and clamp power steering pump to front crossmember F .
Remove the power unit from above .
3 - REFITTING
Replace :
ML5T GEARBOX
Replace :
ALL MODELS
Lower the power unit .
Position power steering pump in its support .
Position the power train .

Refit the right-hand engine mounting .
Position :
Tighten :
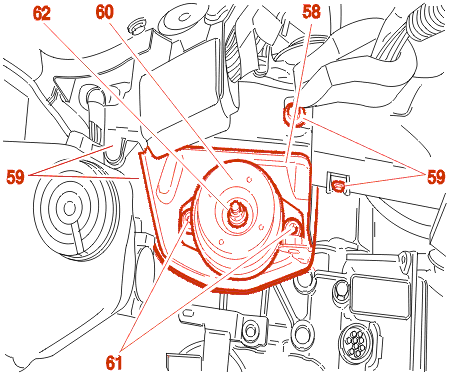
Refit the gearbox bracket .
Tighten the bolts (59) to 2,5 daN.m .
Position :
Tighten :
Lower the power train on to its mountings .
Replace heat shield of exhaust manifold .
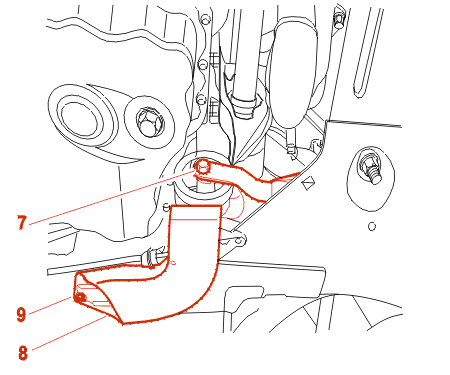
Fit the bottom engine mounting torque reaction rod .
Tighten :
Position ventilation cowling (8) of lower shim .
Replace plastic rivet (9) .
Tighten the drive shaft nuts to 34,5 m.daN .
Refit the air conditioning compressor and its bracket .
Tighten the fasteners to 4 da.Nm .
Fit :
Tighten the power steering pump securing bolts to 4 m.dan .
Continue the fitting operations in the reverse order to removal .
Refill :