B3FG1SK1 - 607
REMOVAL - REFITTING BRAKE SERVO
1 - FOREWORD

Assembling the brake amplifier on its bracket is by using a collar type clip (1) .
IMPERATIVE : this assembly operation requires a great deal of care .
IMPERATIVE : scrupulously follow the method described .
IMPERATIVE : systematically replace the catch (1) and the clips (7) .
2 - SPECIAL TOOLS

[1] tightening sleeve (-).0813 .
3 - REMOVAL

Disconnect the vacuum pipe (2) .
Disconnect and move aside the accelerator cable (3) .

Open the fuse box cover (4) .
Remove the bolts (5) .
Remove the cover under the instrument panel (6) .

Remove the clip (7) .

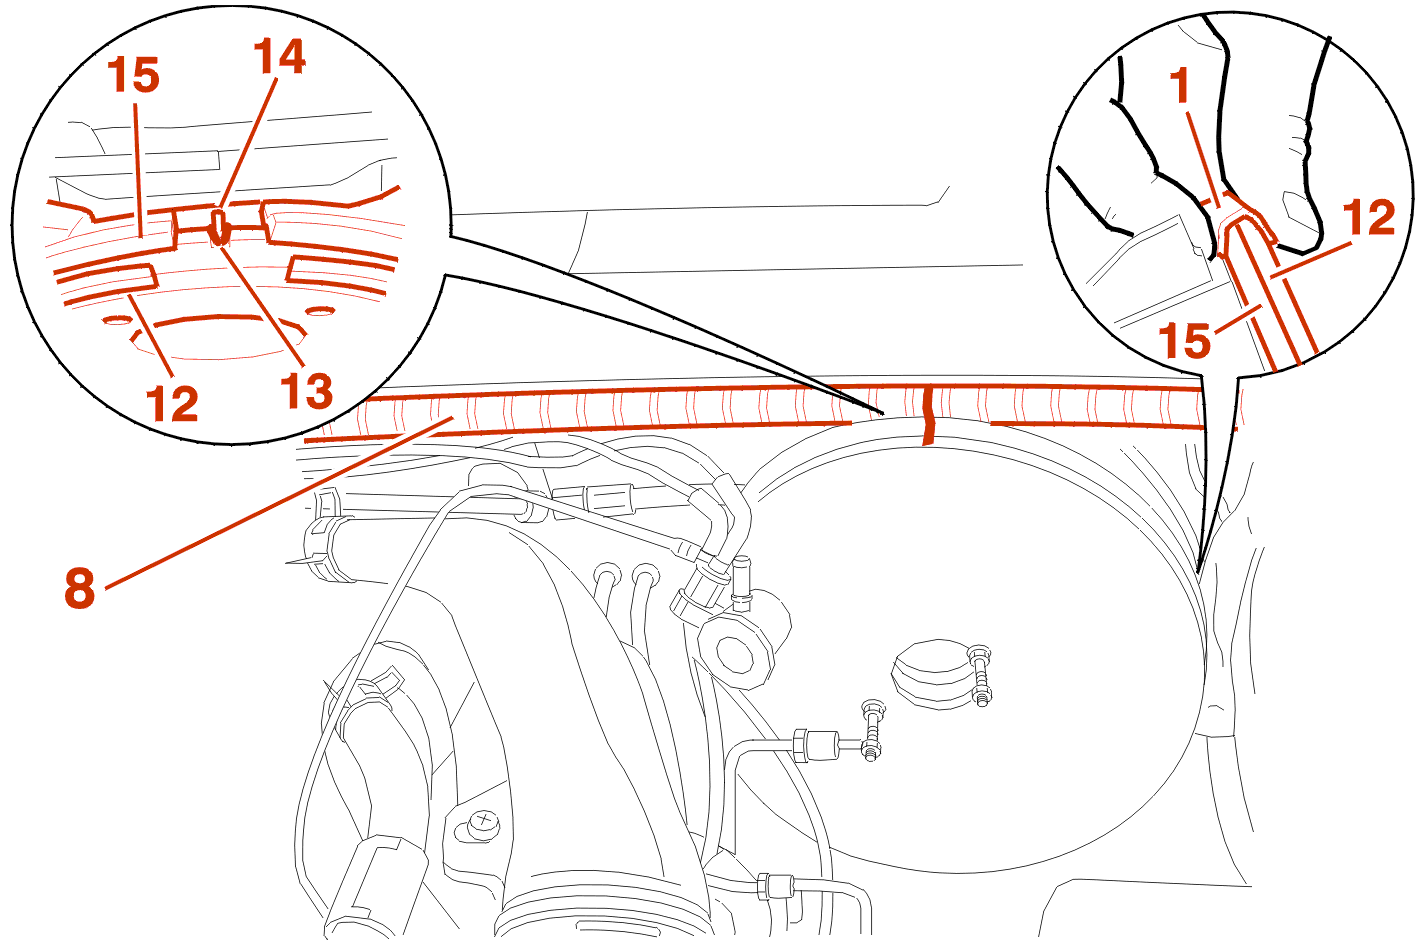
Make a vertical mark on the brake amplifer and on the cable (8) .
Unclip the brake pipe (9) .
Using the tool [1], unscrew the nut of the (1) clip until it reaches peening point (A) .

Move aside the clip .
RIGHT HAND DRIVE

Remove the brake amplifier from its bracket in order to access the fastener (10) .
Remove the clip (10) .
ALL MODELS
Remove the brake servo unit .
Remove the collar (1) .
WARNING : take care not to damage the brake pipes .

Remove the bolts (11) in the event of the brake amplifier being replaced .
Remove the plate (12) .
4 - REFITTING

Position a new clip (1) on its bracket .
NOTE : the new clips are supplied open so that they can be easily refitted .
IMPERATIVE : always replace the brake amplifier securing clip (1) .
WARNING : the clip must not overlap the edges (B) of the bracket .
WARNING : correctly position the clip on the lower bracket at (C) .

Make a mark on the new brake amplifier which lines up with the mark on the old brake amplifier .
When refitting the plate (12) on the brake amplifier, line up the mark with the fastener (13), so that the studs securing the master cylinder are in the correct position .
Tightening torques :
RIGHT HAND DRIVE

Line up the brake amplifier .
Put a new fastener (10) in place .

ALL MODELS
NOTE : on the brake amplifier and the cable (8) align the marks which were made at the time of disassembly .
Fit : The brake servo unit .
IMPERATIVE : check that the position of the fastener (13) in the centralising pin (14) is correct .
WARNING : seat the brake amplifier on the bracket, making sure that the clip (1) is correctly overlapping the bracket (15) and the plate (12) .
NOTE : if the resistance is less than (1) .

Tighten the clip (1) gradually by hand using the tool [1], ensuring periodically that it is correctly positioned, by rotating it and checking manually that the clip correctly overlaps the bracket (15) and the plate (12) .
Tighten the bolt in the clip (1) to 2 dan.m .

WARNING : check again that the clip is in the correct position around the edge and pull hard at several points on the brake amplifier to ensure that it is correctly fastened .
Continue the fitting operations in the reverse order to removal .

IMPERATIVE : always renew : the clip (7) .
Fit : MASTER CYLINDER .
FILL AND BLEED THE BRAKE CIRCUIT .
DYNAMIC STABILITY CONTROL
Bleed the esp pre-charge pump hydraulic system using the diagnostic equipment DIAG 2000 .
ALL MODELS
IMPERATIVE : with the engine running, press very hard on the brake pedal to ensure the reliability of the assembly .